How to use Vianet Mobile App
1. How to Login to your Vianet Mobile App?
- Download Vianet Mobile App here: www.vianet.com.np/app-download
- Open your Vianet App
-
Enter your “Customer ID” and then tap on “Register“.
Your Customer ID is provided by Vianet at the time of installation. Please check for welcome email sent by Vianet in your registered email address or contact us for details.
-
You should now receive an SMS or Email with a verification code on the primary mobile number or email registered for your account.
Enter the Verification Code and tap on “Verify”.
If you did not receive the SMS or Email with the verification code, please tap on the option to send again or contact us if the issue persists.
- Success! You are now logged in.
2. How to Enable your Internet Account after it has been disabled due to pending dues using Vianet Mobile App?
-
Open your Vianet App
If you do not have Vianet Mobile App, click on the First Step (How to Login to Your Vianet Mobile App), to learn how to download and login -
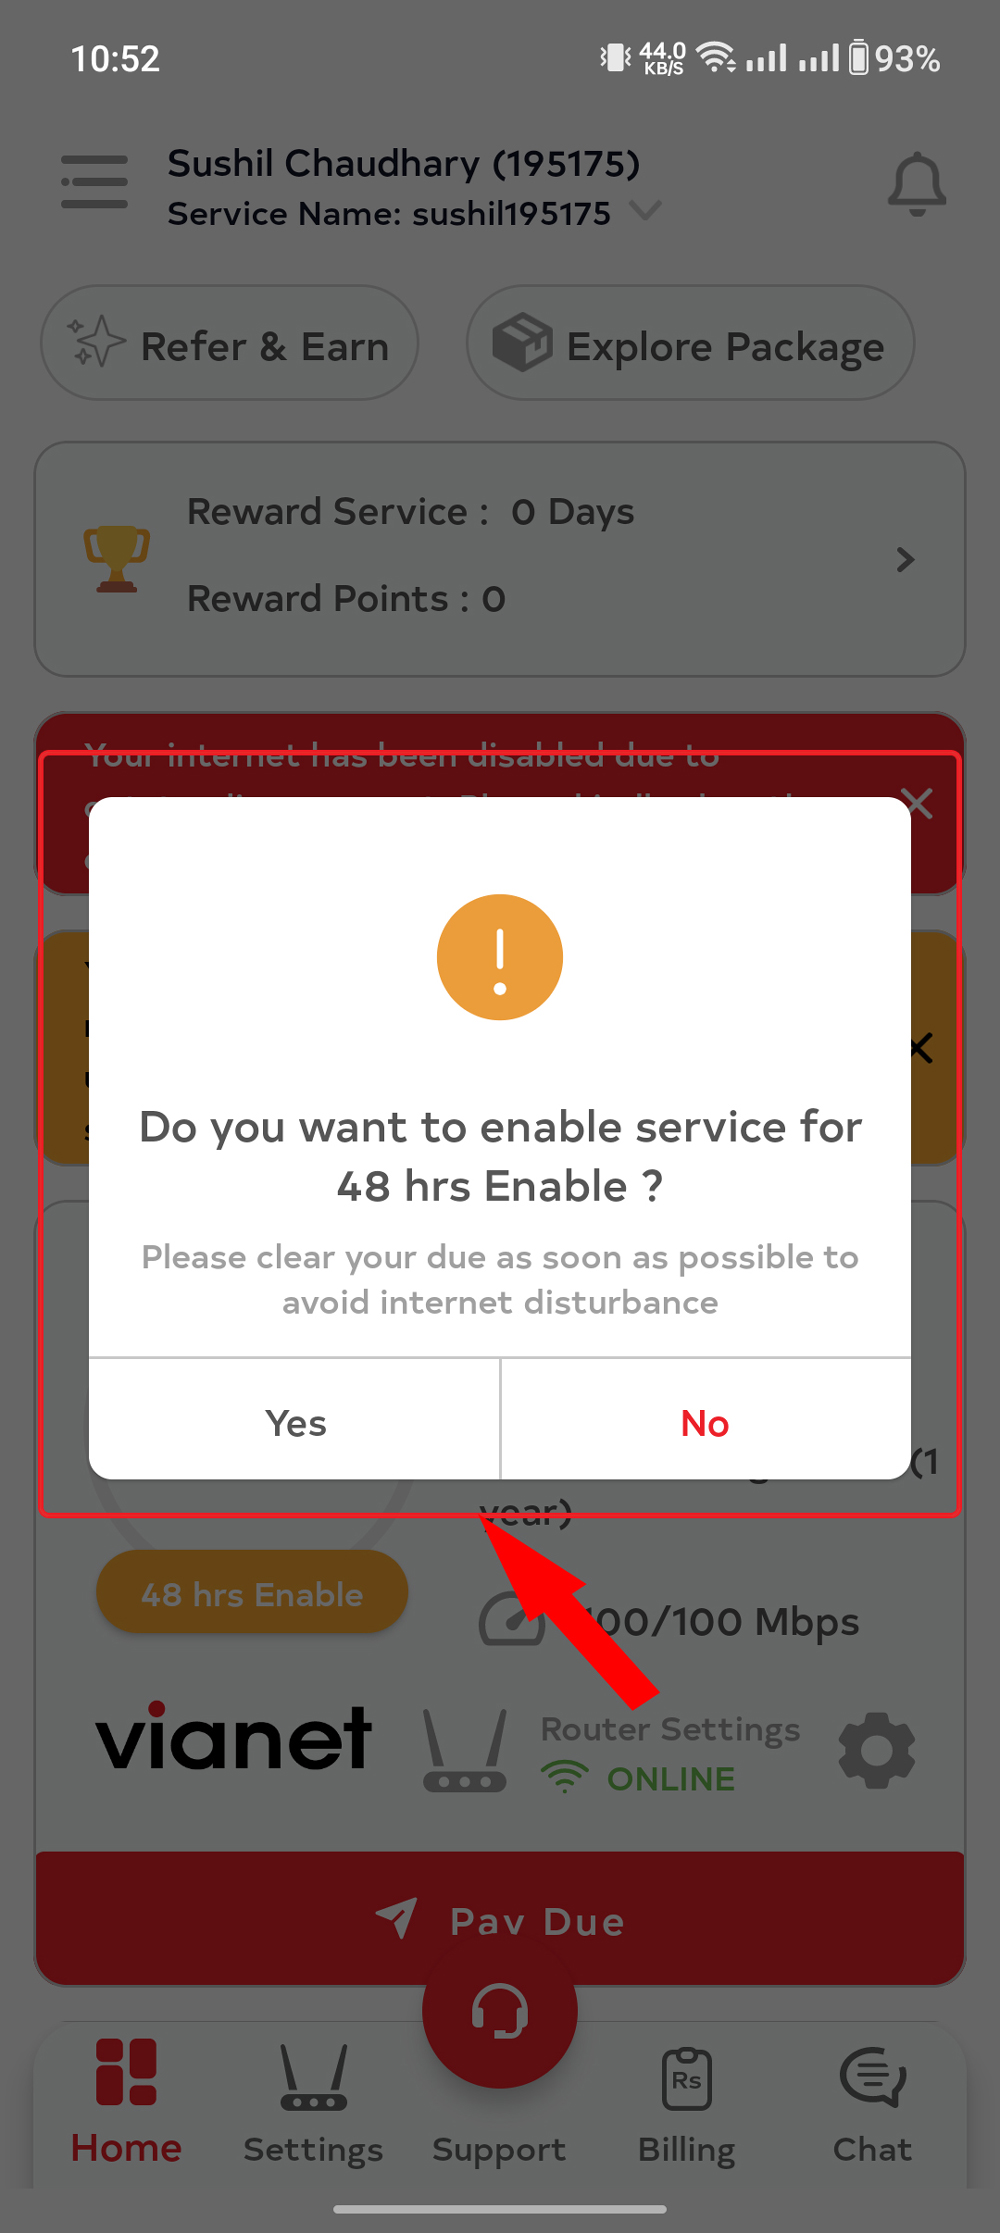
On the Dashboard, Internet Disabled Notification and Status will appear

-
Click on the “24hrs Enable” button on the screen.
Please note that if the “Enable” button is not visible, it means your Internet is not disabled. Please do contact to troubleshoot your issue in such cases.
Then confirmation Popup will received with “Yes” and “No” button
-
Your Internet account will now be enabled. You should receive a pop-up notification informing you that your internet connection has been enabled.
Once Enabled, please note your service will be activate until 9:00am of the next day.
For Example, if you Enable you service on 8 April, your service will be active until 9:00am of 10 April.
Please kindly clear your dues before then.
Please note that the feature can be used one time only.
3. How to Renew in Advance before Package has Expired using Vianet Mobile App?
-
Open your Vianet App
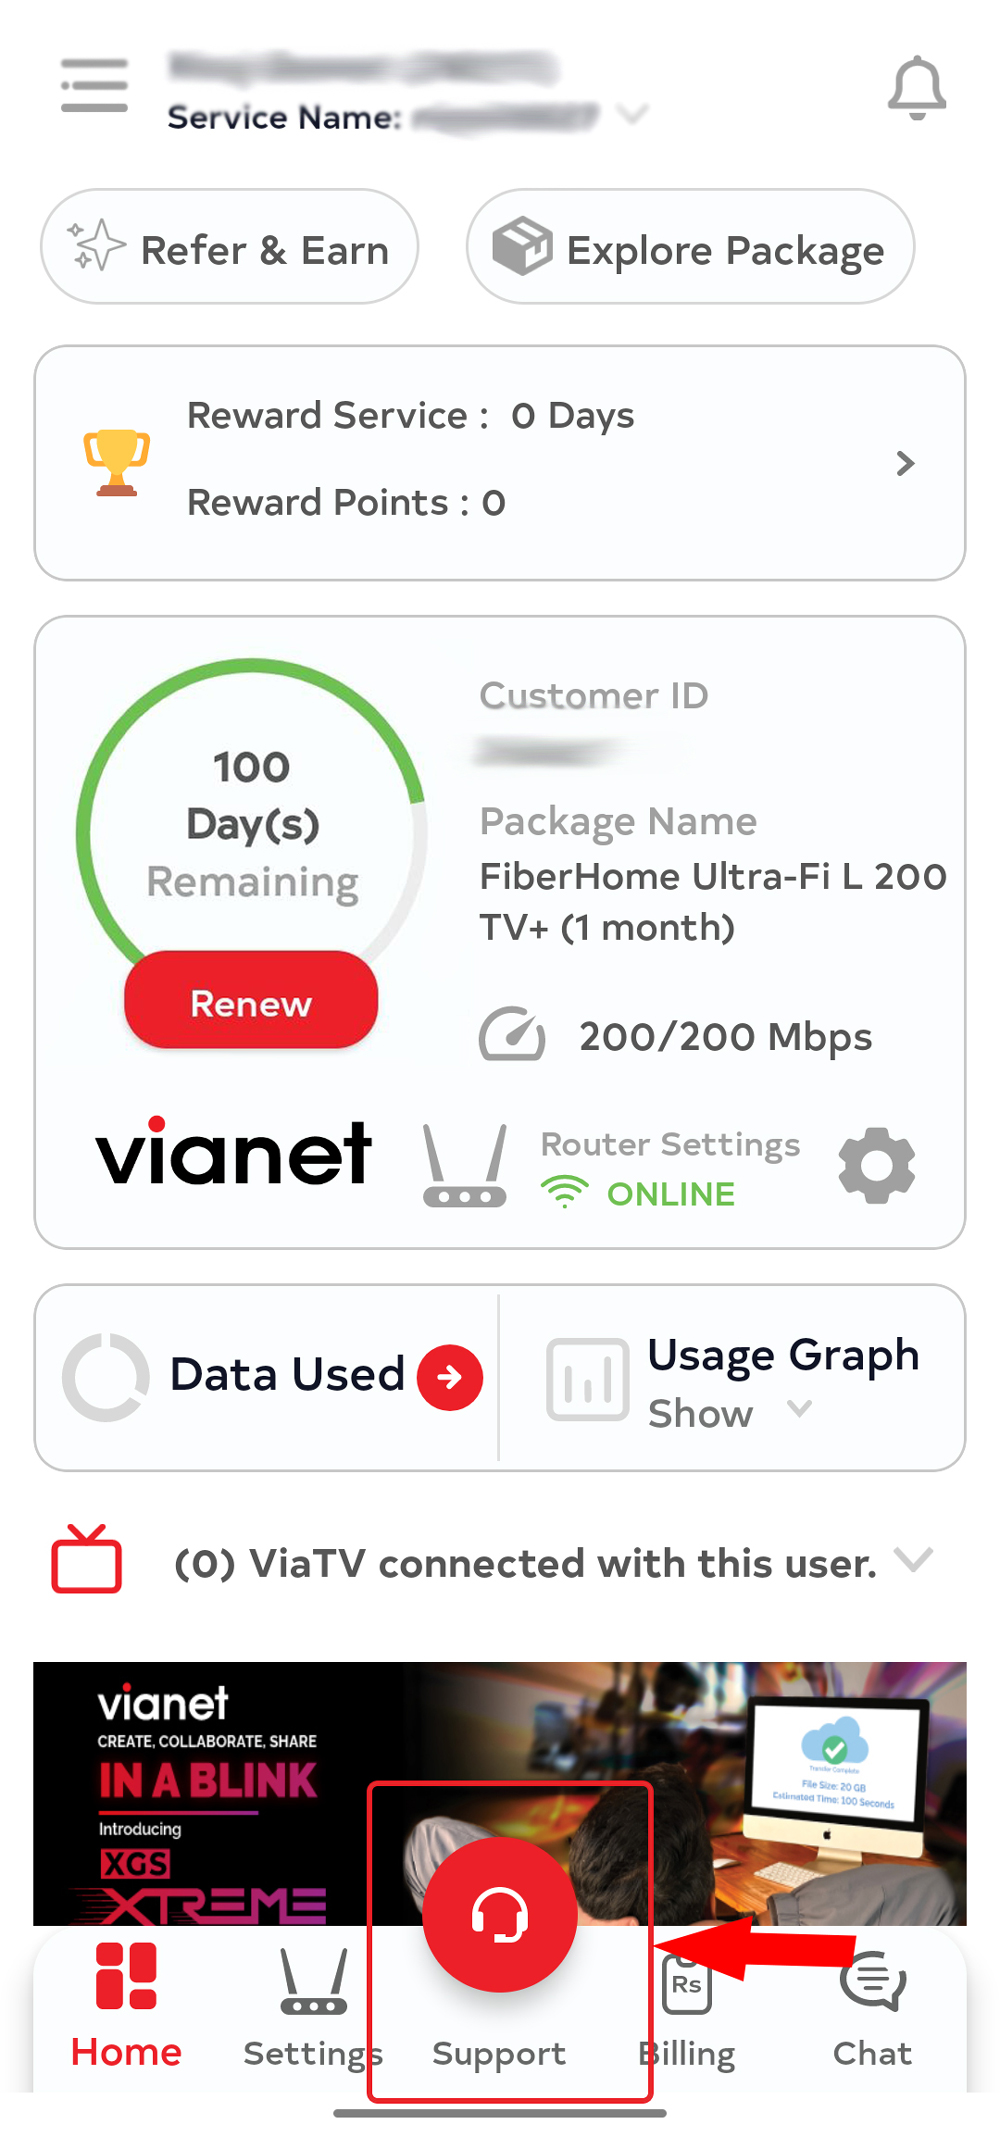
If you do not have Vianet Mobile App, click on the First Step (How to Login to Your Vianet Mobile App), to learn how to download and login - You are now at the Service Account Details page. You can check your expiration date on the top left circular icon that mentions “Expires in X Days”.
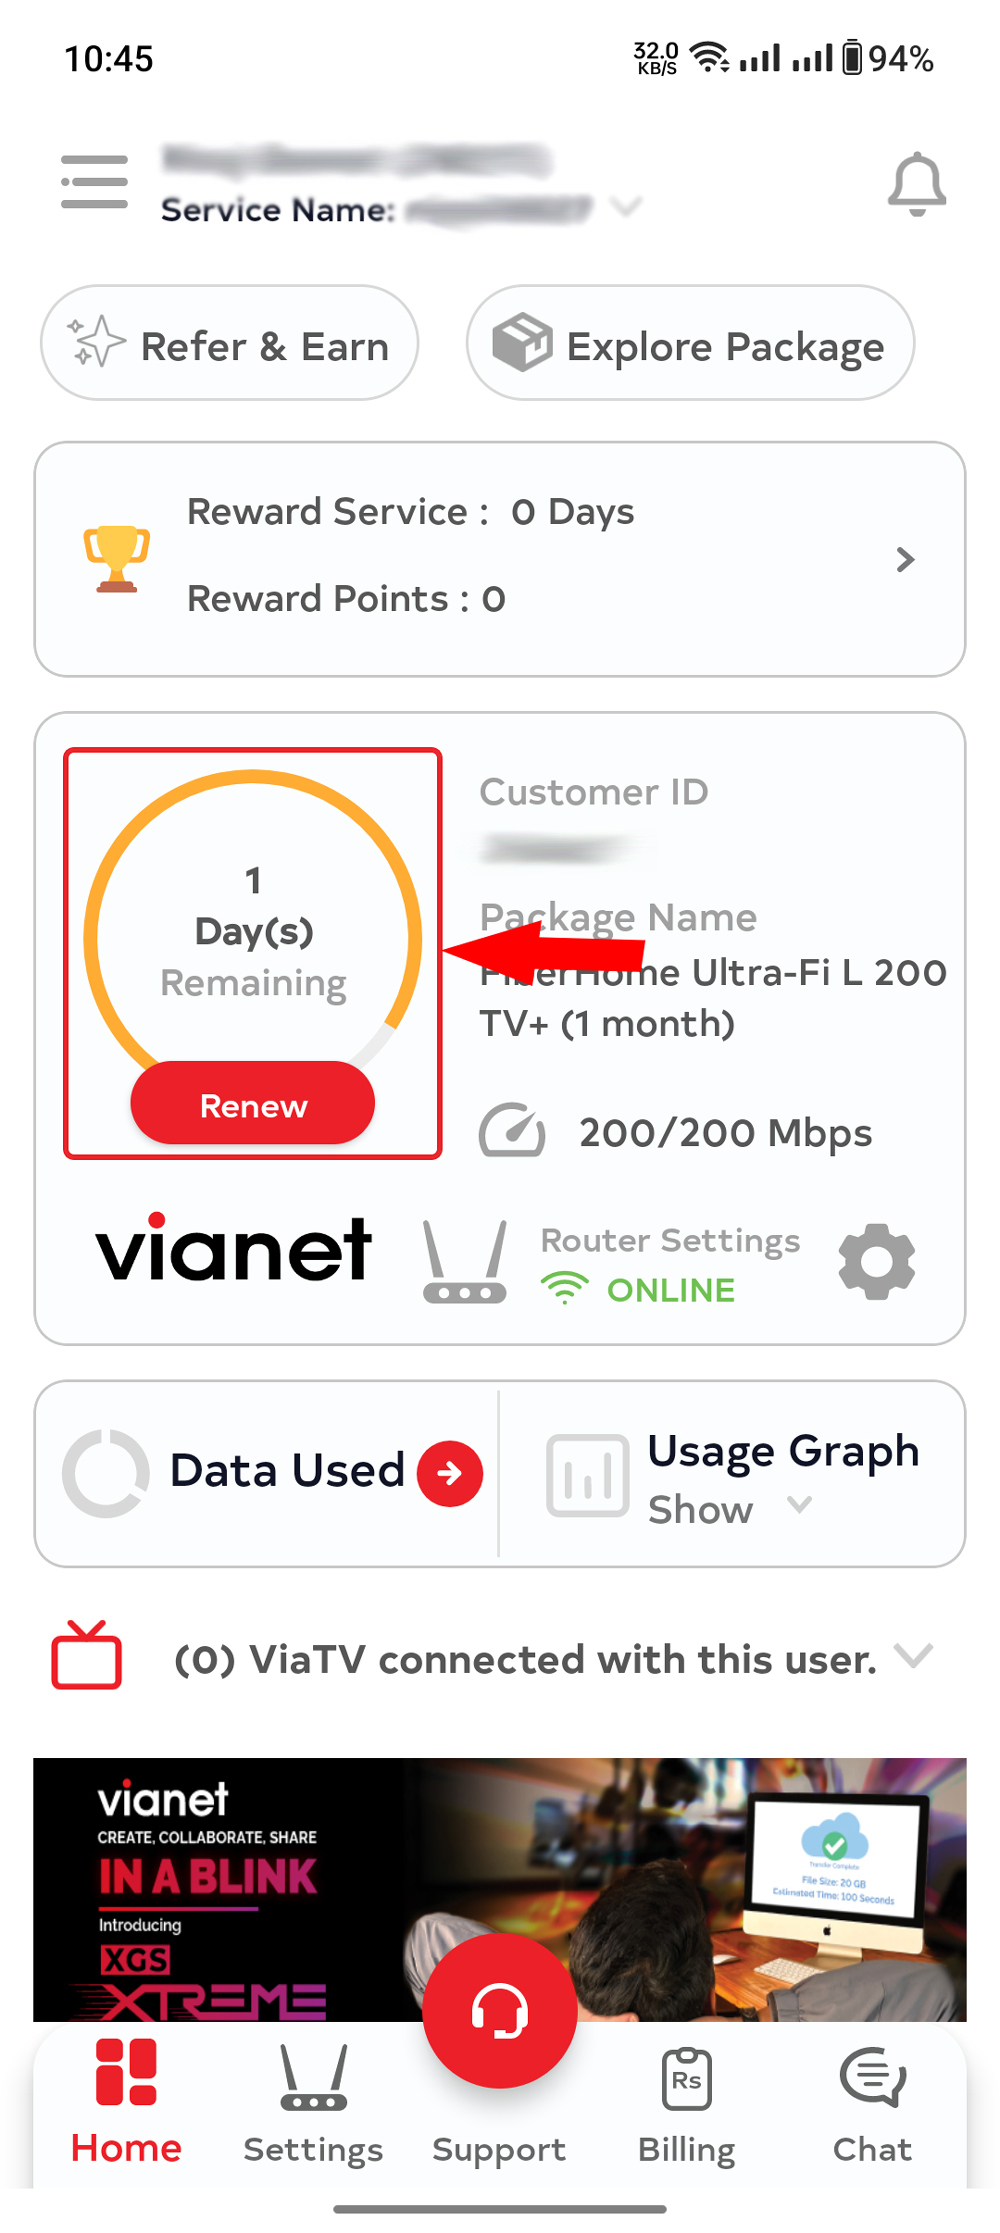
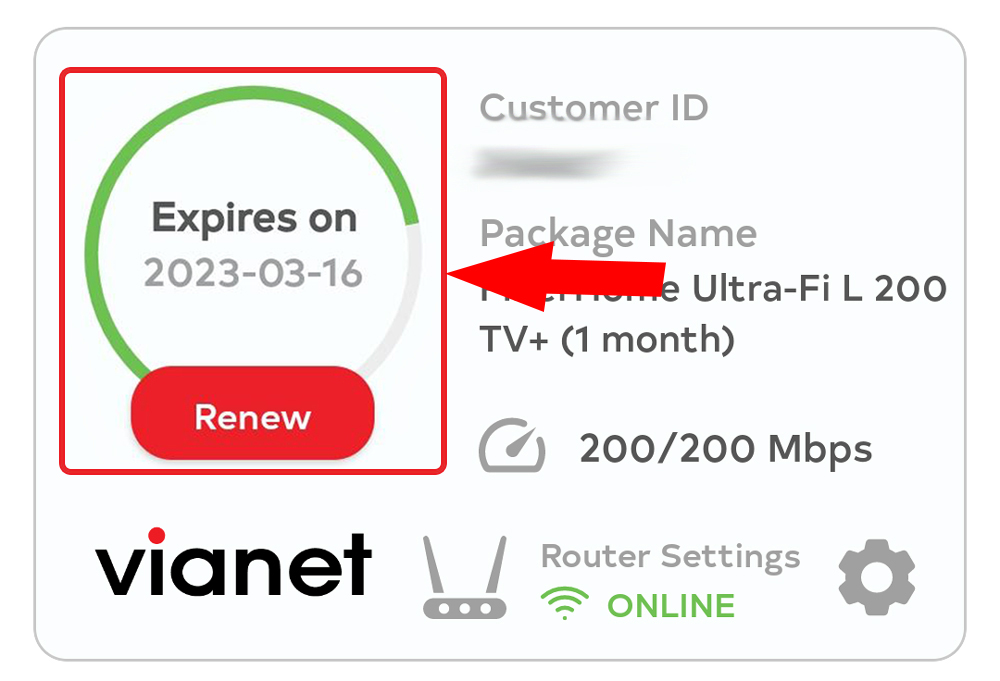
You can tap on the Expiry Date Icon to view your date of Expiry:
You can renew your account before it has expired.
-
Click on the “Renew” icon on the dashboard as shown below:
*Note: If user are not able to see the “Renew” icon please kindly, update or reinstall the app.
-
You are now in the Renewal screen
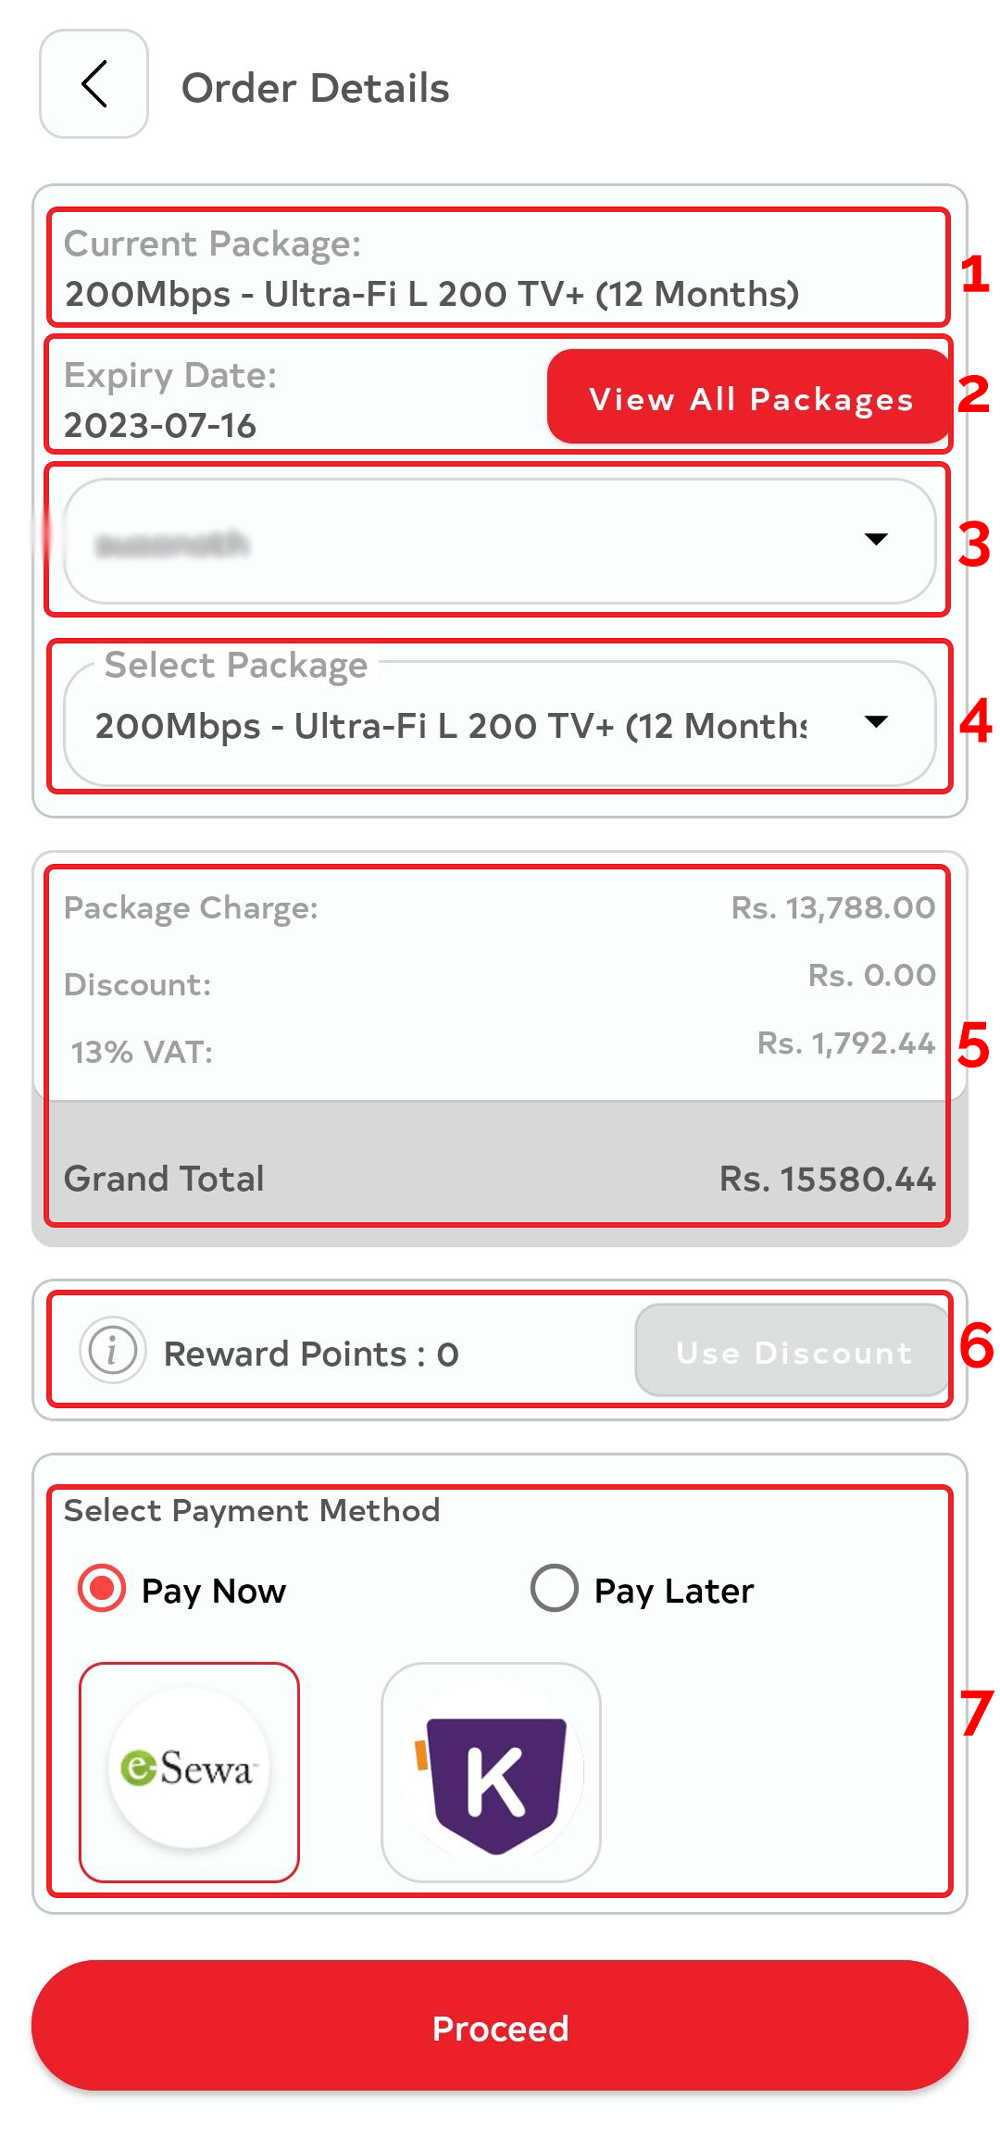
In section 1, user can view”Current Package“, that they were currently using.
In section 2, user can view”Expiry Date” And “View All Packages” button which wil shows all the details about the package
In section 3, user can view”Services List“. if user has multiple internet services, they can choose the Internet service they want to renew. If user has only one, that will be selected automatically.
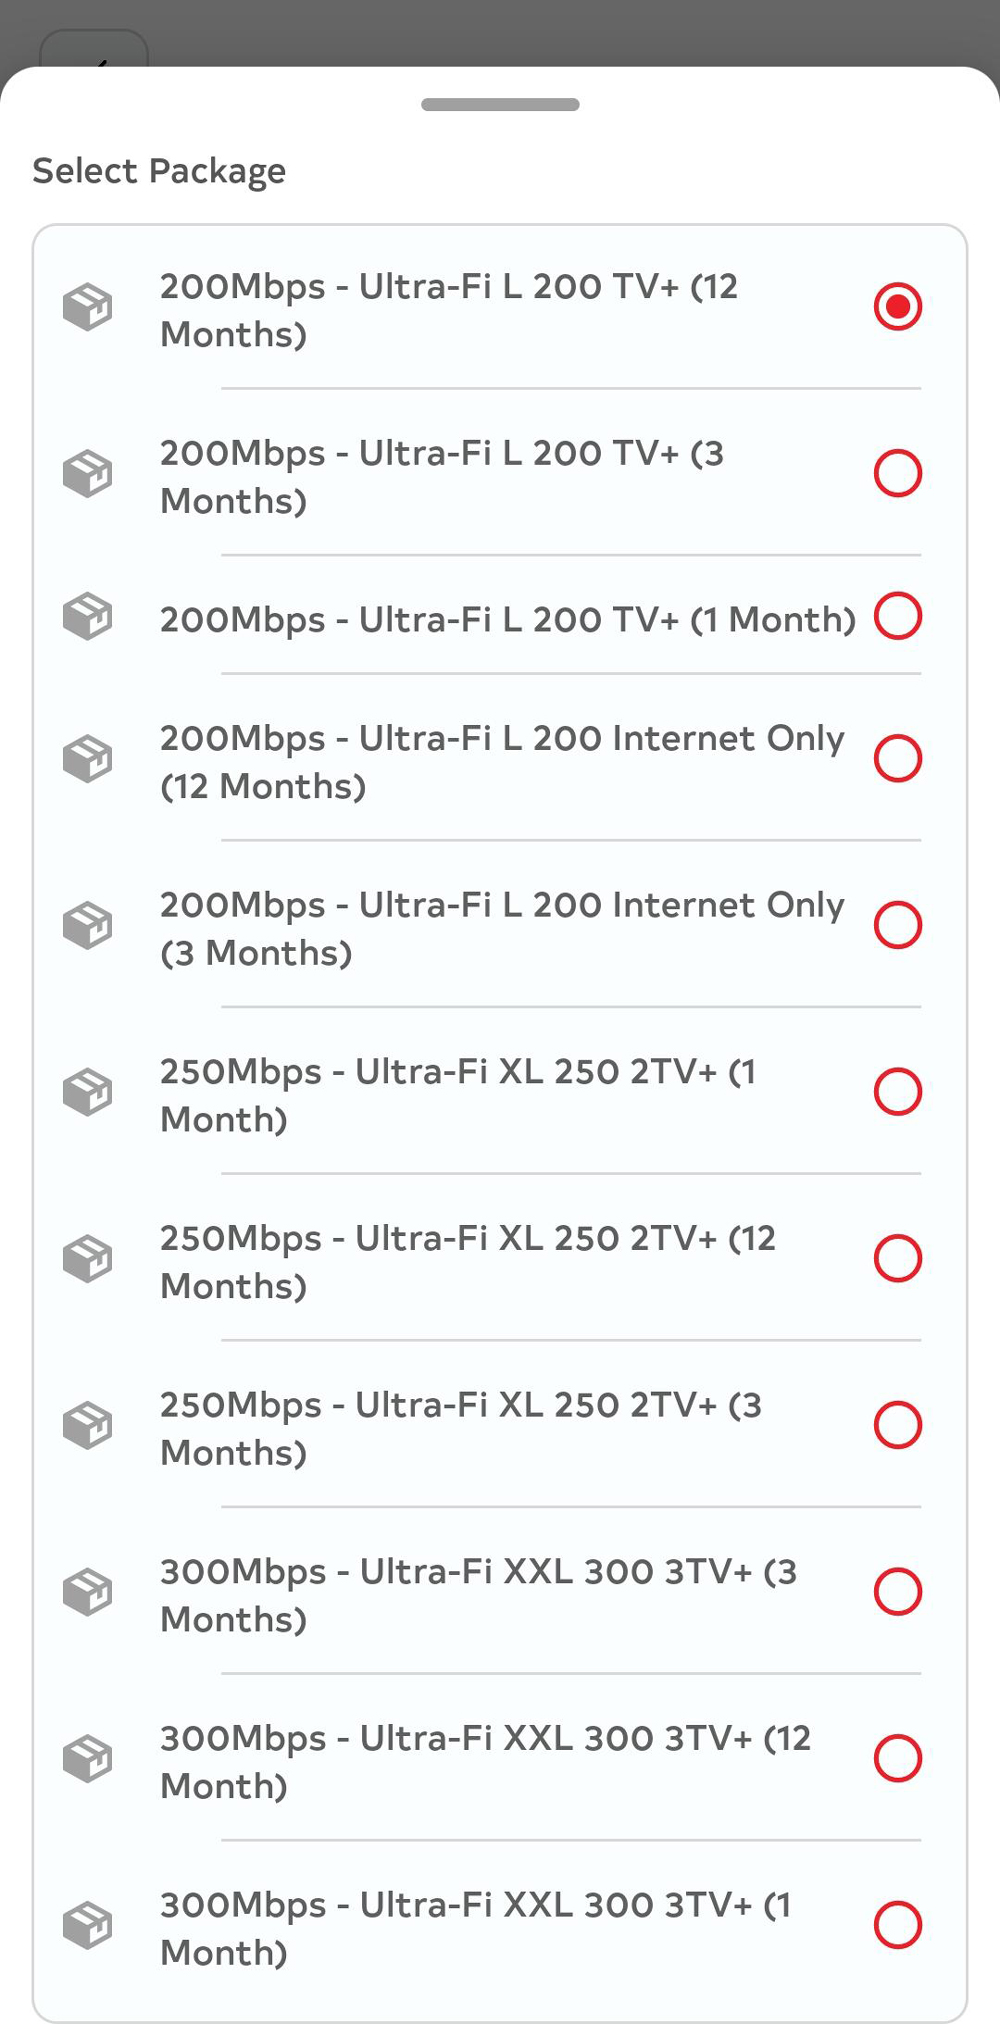
In section 4, user can “Select Package” they want to renew.
In section 5, user can view the “Price” details of the package.
In section 6, user can view the “Reward Point” they get by referring their friends & family
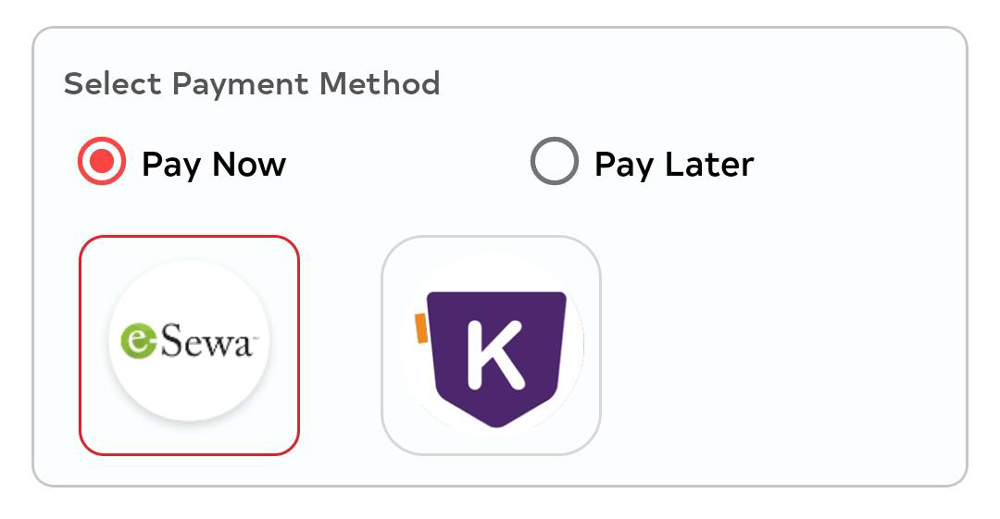
In section 6, user can view the “Select Payment Method” with list of Payment getway like ESewa and Khalti
-
User must select the package they want to renew.
User’s current package is auto-selected at the top of the list.
-
User can then proceed for payment by selecting any one of the payment methods available as shown below:
-
User will be redirected to the payment gateway selected. Please follow the instruction on screen to complete payment process.
Please note that package will only be renewed once payment process is completed.
4. How to open a Support Ticket using Vianet Mobile App?
-
Open your Vianet App
If you do not have Vianet Mobile App, click on the First Step (How to Login to Your Vianet Mobile App), to learn how to download and login -
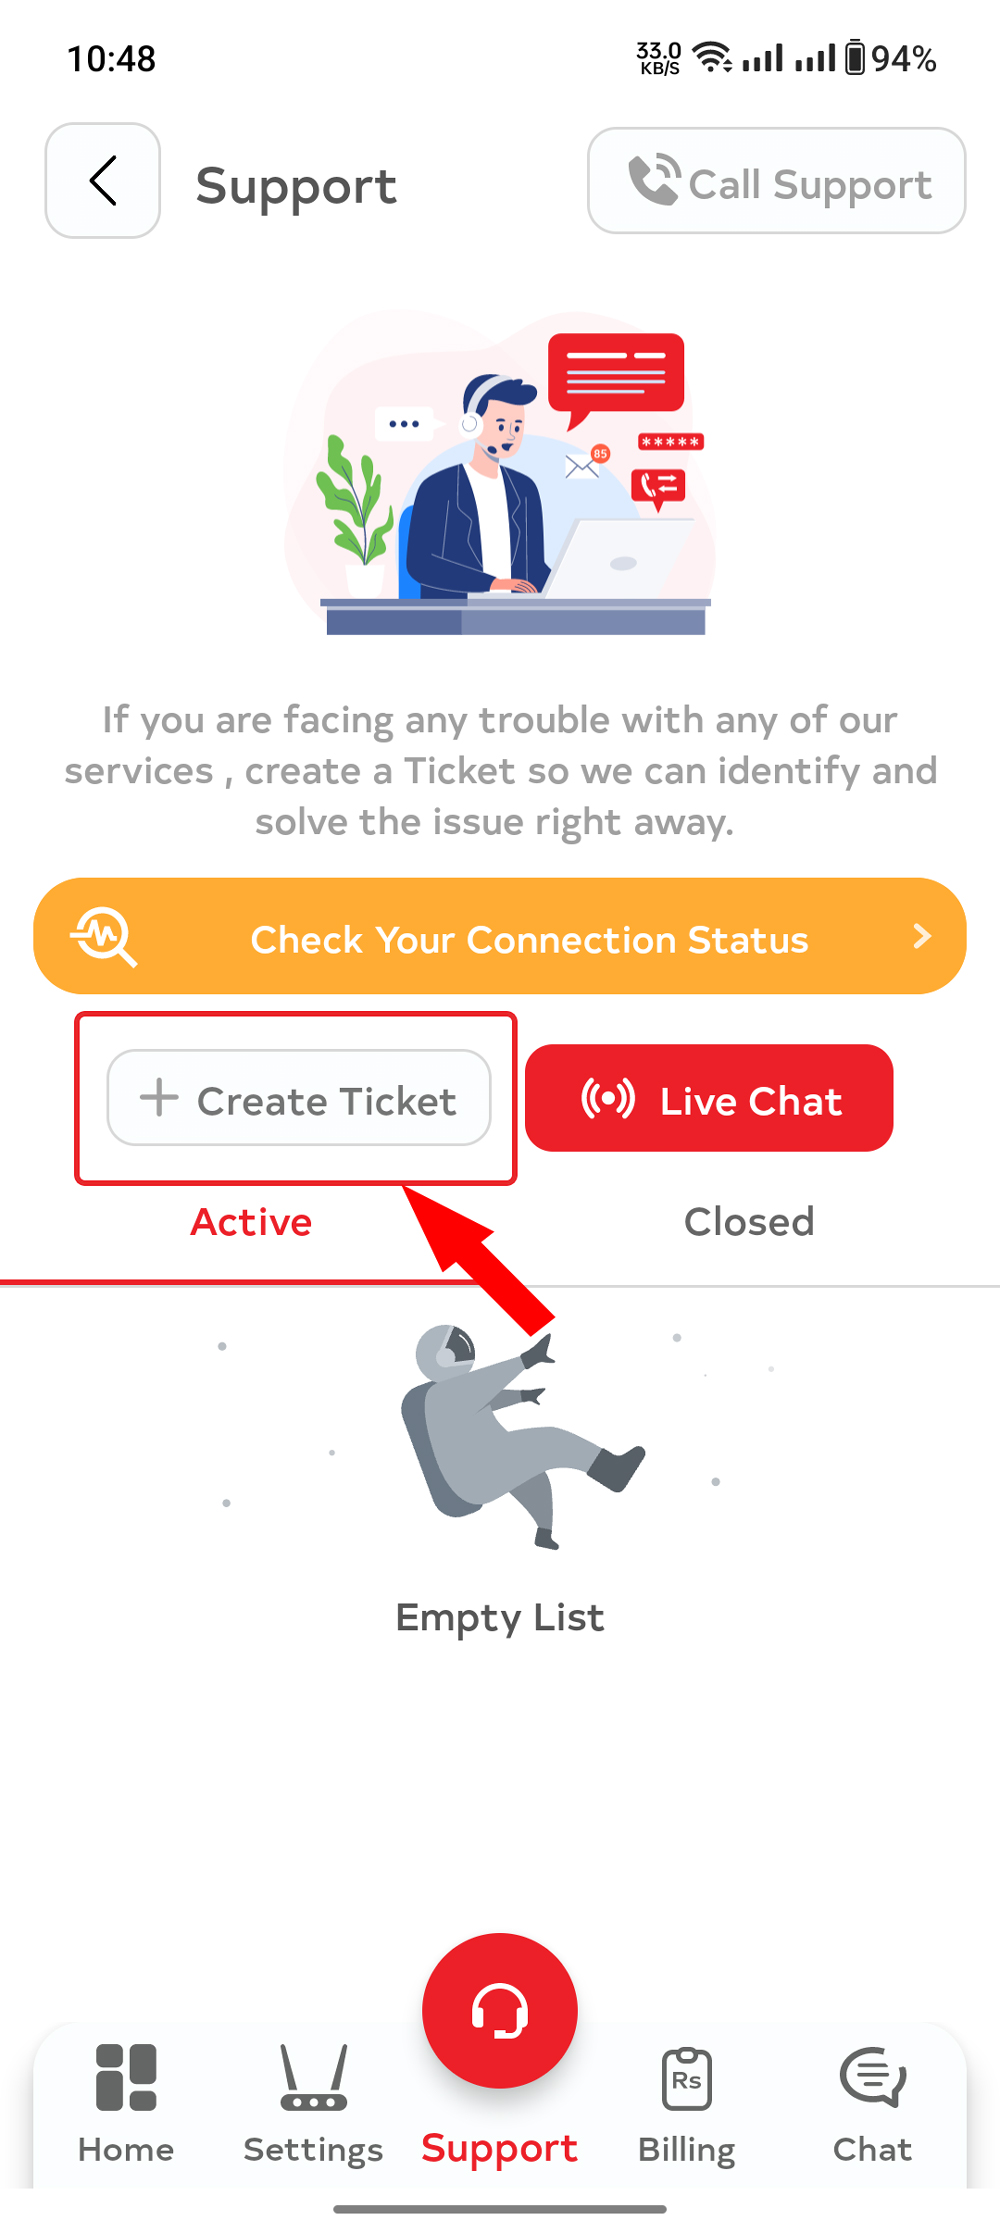
Click on the “Support” icon on the buttom of the page OR select from Menu.
This opens the Support section of the App. Here you can view list of current and previous support tickets open. You can also chat directly with our Customer Care representative by clicking on any active Support Ticket in this page.
-
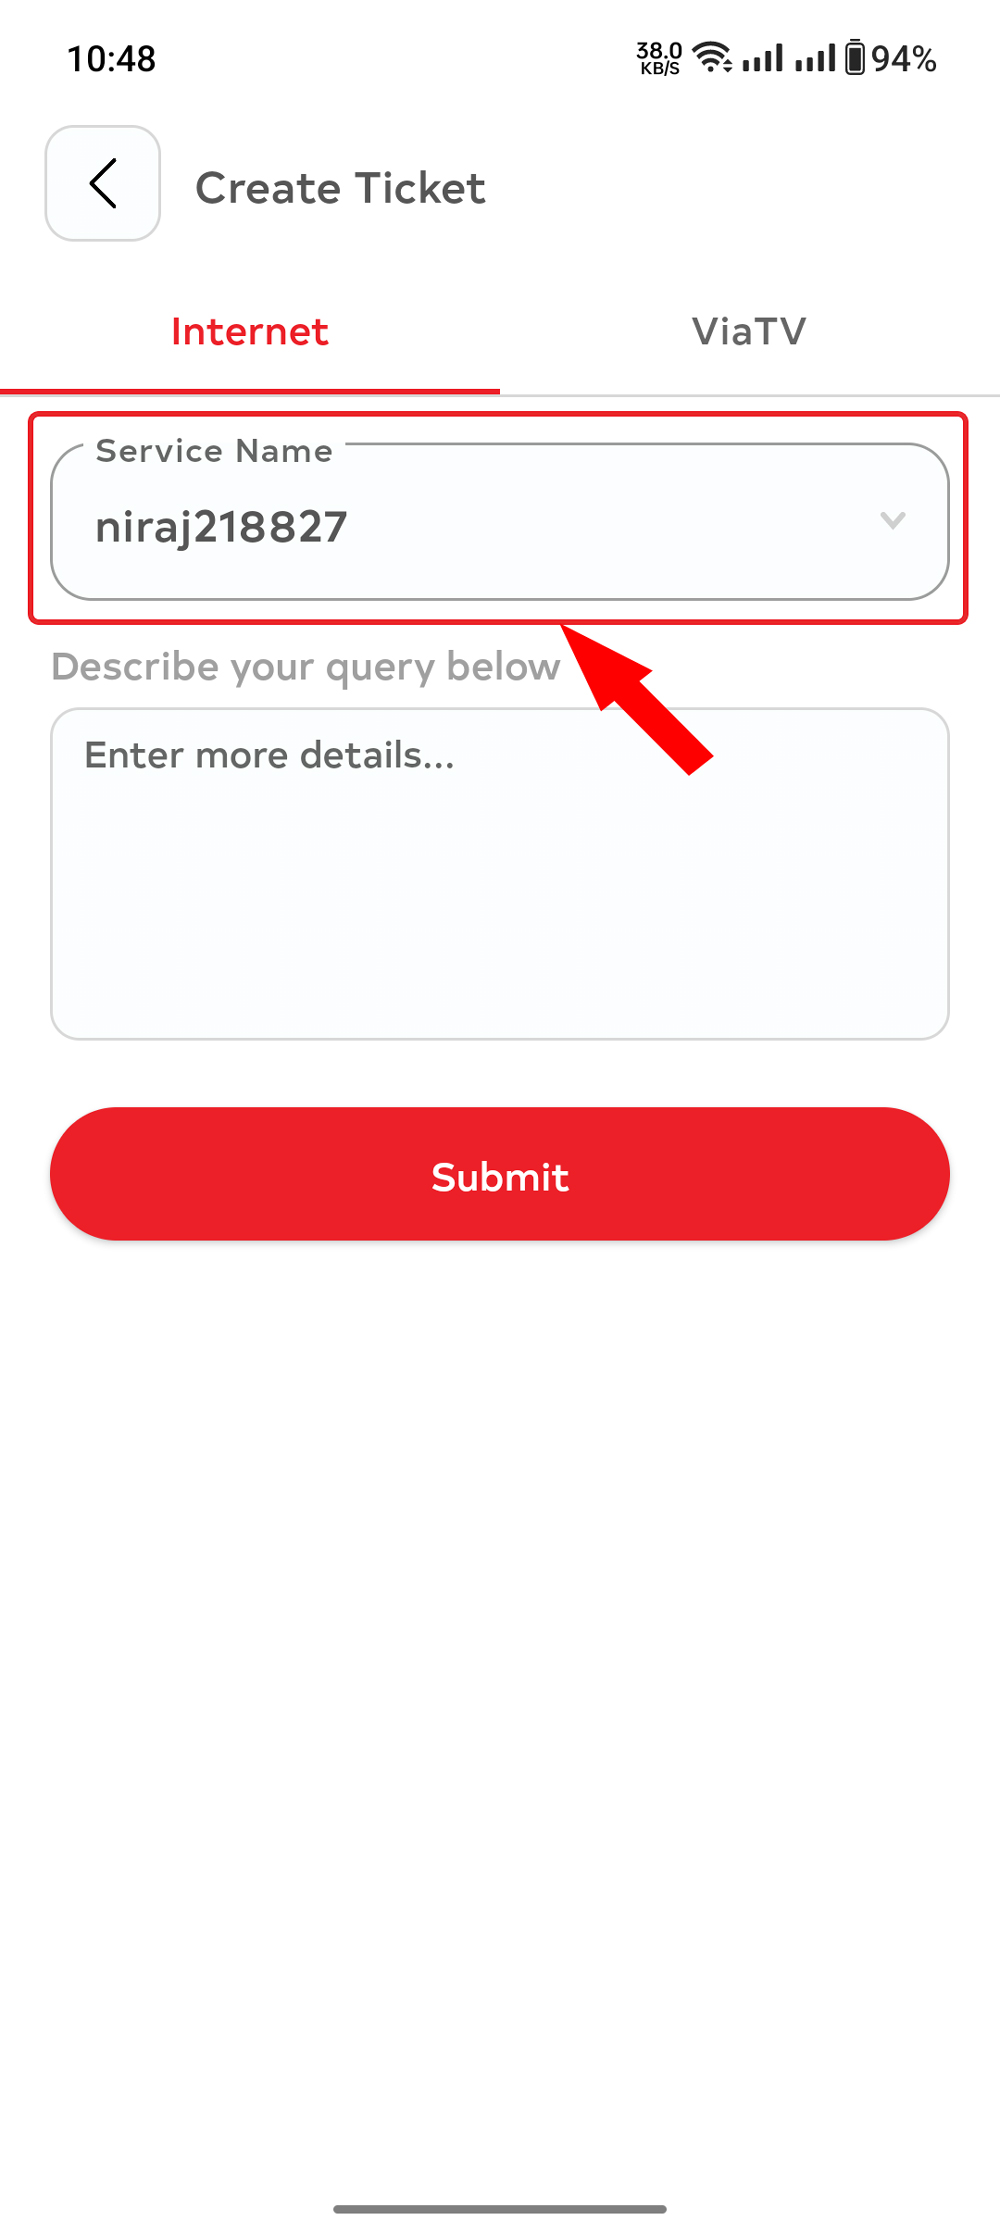
Click on the “Create Ticket” on the Internet service you want to open a Support Ticket for.
-
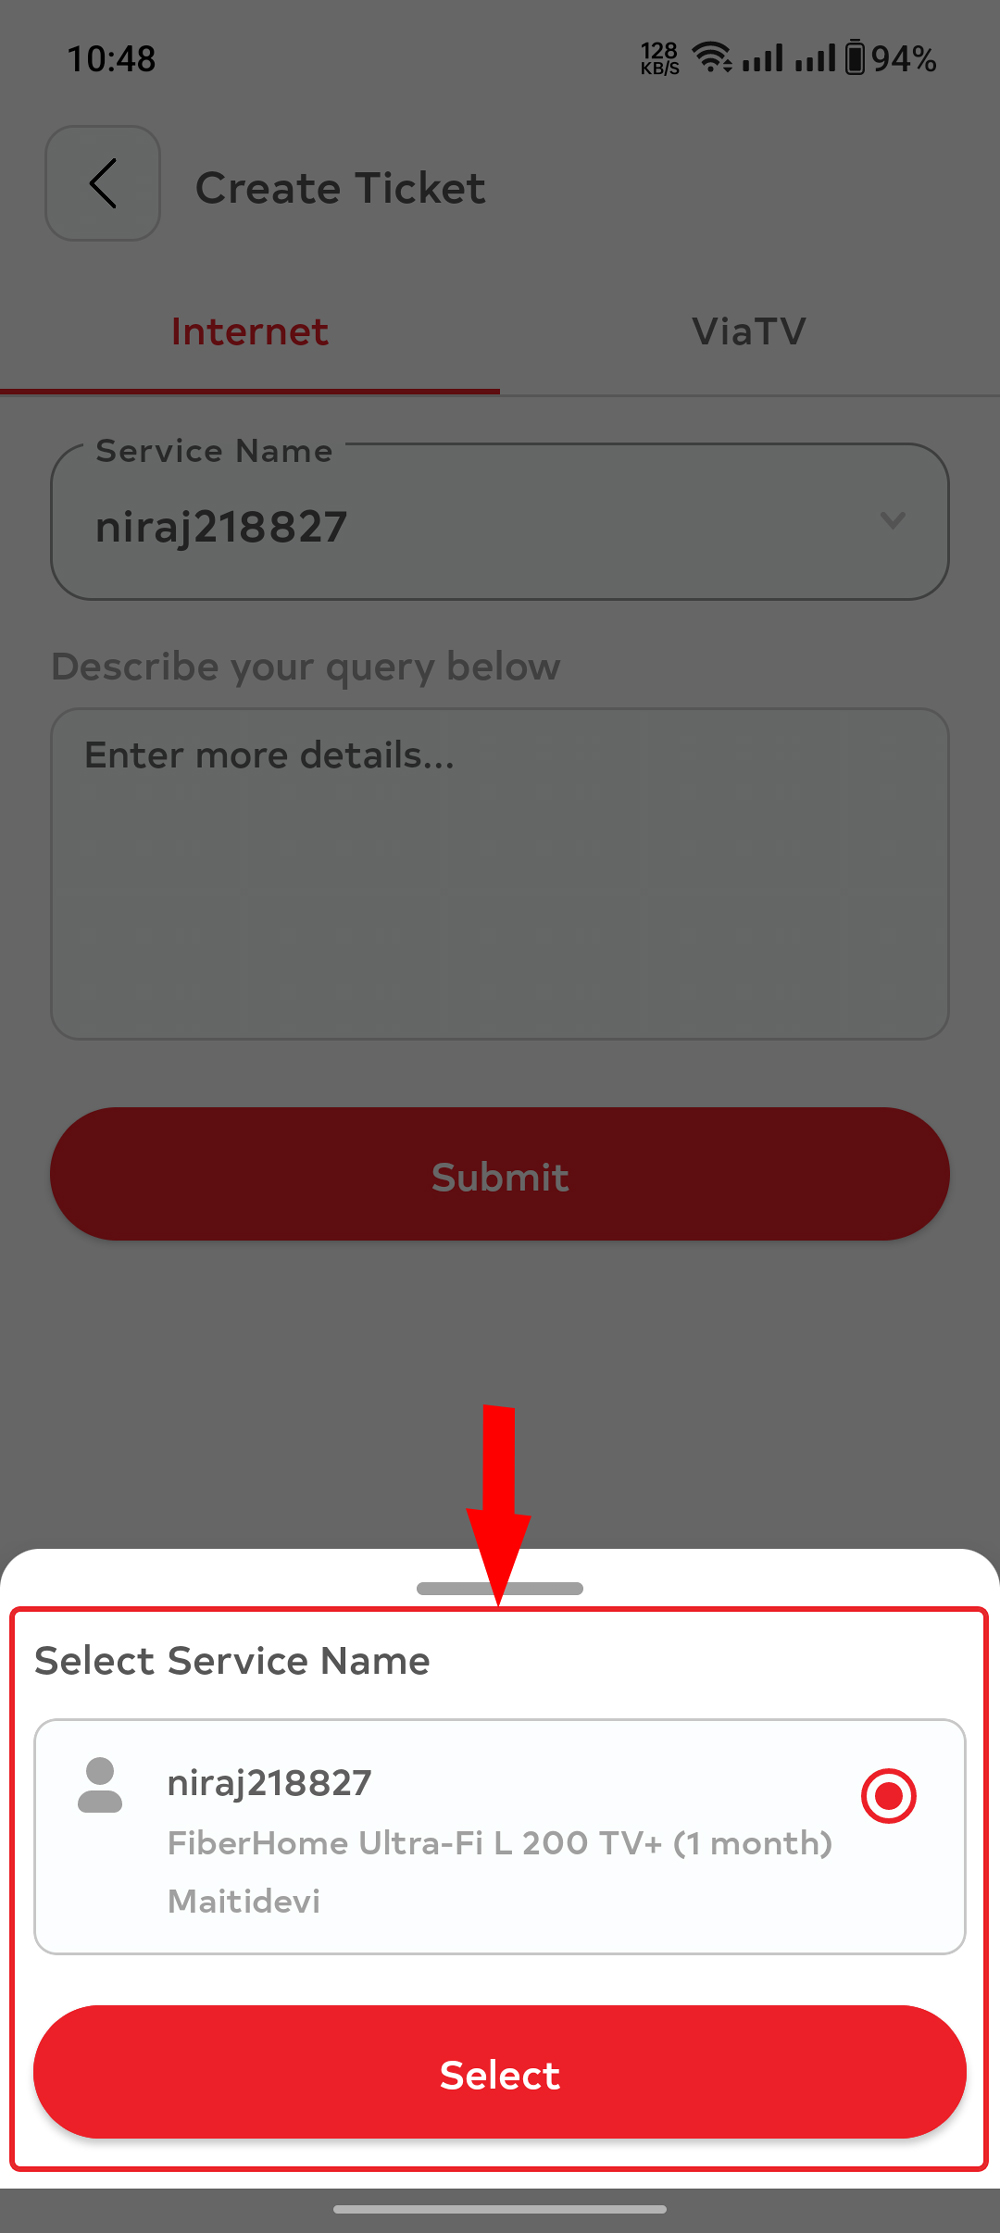
Select the type of Service “Internet” or “IPTV” for which you want to register the Support Ticket.
-
Please select the service for which you want to open a Support Ticket, if user has multiple internet services, they can choose the Internet service they want to create support. If user has only one, that will be selected automatically.
-
Please kindly describe further details of the issue that you are facing in the remarks section.
- Please tap on “Submit” button
-
Your Support Ticket is now open. You should see the new support ticket in the support section of the app. Tap on the recently opened support ticket on “Active” to chat directly with our support staff.
You can also check for the past Tickets that is alreay completed on “Closed” Tab
5. How to Pay Online using Vianet Mobile App?
- Open your Vianet App
- Select the “Pending Bills” Icon in the Dashboard.
-
The “Pending Bills” section shows all of the pending bills associated for your account.
Please note that the total Internet package amount is divided into two bills, “Package” charge and “Support and Service” Charge. Both bills are required to be paid for the Internet package amount to be cleared.
This is done because the Internet package price shown in our rate list is inclusive of Telecommunication Service Charge and Basic Support Service charge. Basic Support charge consists of 24×7 phone support and service maintenance up to Client Optical Termination Box.
- Tap on “Pay“” icon on the right side on an unpaid bill you want to make payment for.
- Select the online payment gateway you want to use.
- Follow the instructions on the screen
Please ensure you have renewed your account and have pending bills before proceeding.